-de8bd8f33c3e44a59907dafe1884f228.png)


下载
1、进入官网点击 Downloads 进入如下页面:

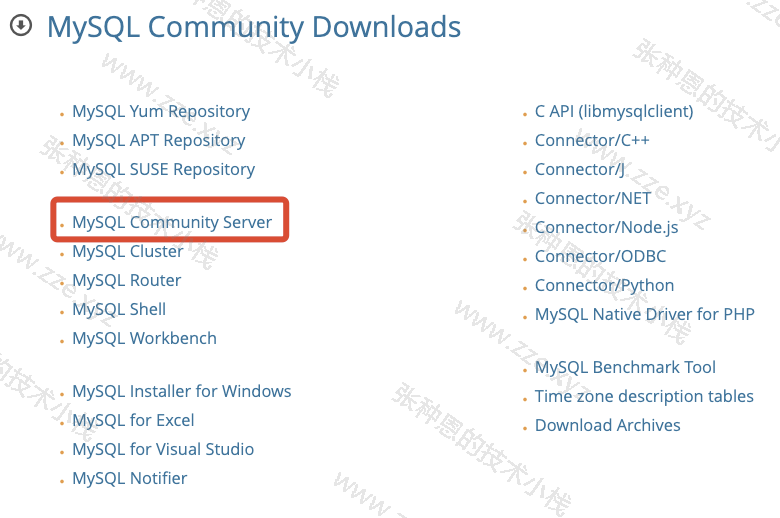
2、选择 MySQL Community Server:
3、选择 Archives下载历史版本:

4、选择需要的版本进行下载:

安装
下面在 CentOS 7 中使用 MySQL-5.7.28 二进制版本进行安装。
1、解压安装:
# 上传文件到 /data/app,解压
$ mkdir -p /data/app
$ tar xf mysql-5.7.28-linux-glibc2.12-x86_64.tar.gz
# 创建软链接
$ ln -s mysql-5.7.28-linux-glibc2.12-x86_64 mysql
# 添加环境变量:
$ echo 'export PATH=/data/app/mysql/bin:$PATH' >> /etc/profile  && . /etc/profile
# 验证,查看 mysql 版本
$ mysql -V
mysql  Ver 14.14 Distrib 5.7.28, for linux-glibc2.12 (x86_64) using  EditLine wrapper
2、环境清理:
# 清理 mariadb 相关程序
$ yum remove -y mariadb mariadb-*
# 如果存在 /etc/my.cnf,删除它
$ rm -rf /etc/my.cnf
3、安装依赖包:
$ yum install -y libaio-devel
4、创建相关目录及用户,并做授权:
# 创建数据目录
$ mkdir -p /data/3306/data
# 创建用户
$ useradd -M -s /sbin/nologin mysql
# 授权
$ chown -R mysql.mysql /data/3306/data
5、初始化数据:
# 5.7+ 版本初始化,下述命令中:
#     mysqld:核心程序
#     --initialize-insecure:初始化核心参数
#     --user:管理用户
#     --basedir:软件路径
#     --datadir:数据存放目录
$ mysqld --initialize-insecure --user=mysql --basedir=/data/app/mysql --datadir=/data/3306/data
2020-04-21T04:07:01.958781Z 0 [Warning] TIMESTAMP with implicit DEFAULT value is deprecated. Please use --explicit_defaults_for_timestamp server option (see documentation for more details).
2020-04-21T04:07:02.149951Z 0 [Warning] InnoDB: New log files created, LSN=45790
2020-04-21T04:07:02.190415Z 0 [Warning] InnoDB: Creating foreign key constraint system tables.
2020-04-21T04:07:02.254554Z 0 [Warning] No existing UUID has been found, so we assume that this is the first time that this server has been started. Generating a new UUID: 8de28e0b-8385-11ea-8ddc-000c29b7d4cd.
2020-04-21T04:07:02.272272Z 0 [Warning] Gtid table is not ready to be used. Table 'mysql.gtid_executed' cannot be opened.
2020-04-21T04:07:02.790087Z 0 [Warning] CA certificate ca.pem is self signed.
2020-04-21T04:07:03.042810Z 1 [Warning] root@localhost is created with an empty password ! Please consider switching off the --initialize-insecure option.
两种初始化的方式:
--initialize-insecure:不安全方式,初始化完成并启动数据库后不需要可无密码登录;--initialize:安全方式,初始化完成之后会生成临时随机密码,不能用作管理数据库,在第一次登录数据库时时需要改掉这个密码;
6、准备配置文件:
$ cat << EOF > /etc/my.cnf
[mysqld]
user=mysql
basedir=/data/app/mysql
datadir=/data/3306/data
socket=/tmp/mysql.sock

[mysql]
socket=/tmp/mysql.sock
EOF
7、准备启动脚本:
$ cp /data/app/mysql/support-files/mysql.server /etc/init.d/mysqld
$ chkconfig --add mysqld
8、启动:
$ systemctl start mysqld
$ systemctl status mysqld
● mysqld.service - LSB: start and stop MySQL
   Loaded: loaded (/etc/rc.d/init.d/mysqld; bad; vendor preset: disabled)
   Active: active (running) since Tue 2020-04-21 12:32:11 CST; 8s ago
     Docs: man:systemd-sysv-generator(8)
...
9、测试客户端连接,密码为空:
$ mysql -uroot -p
Enter password:
Welcome to the MySQL monitor.  Commands end with ; or \g.
Your MySQL connection id is 3
Server version: 5.7.28 MySQL Community Server (GPL)

Copyright (c) 2000, 2019, Oracle and/or its affiliates. All rights reserved.

Oracle is a registered trademark of Oracle Corporation and/or its
affiliates. Other names may be trademarks of their respective
owners.

Type 'help;' or '\h' for help. Type '\c' to clear the current input statement.

mysql>
10、修改 root 用户密码:
# 设置 root 用户的密码为 1234
$ mysqladmin -uroot -p password 1234
# 输入原来的密码,此时因没有密码直接回车即可
Enter password:
mysqladmin: [Warning] Using a password on the command line interface can be insecure.
Warning: Since password will be sent to server in plain text, use ssl connection to ensure password safety.
评论区